Haute Couture is where it's at.

Join us all month long as we post challenges based on the exclusive and often trend-setting designs that we call Fashion.
A new Blue Plate Special challenge is posted each Monday (sketch), Wednesday, Friday and Saturday. Participants have until the 3rd of the following month to complete and post their creations in the Cookin' up Creations Gallery.
Prize will be a $20 Gift Certificate to their favorite online store (random drawing).....
What Is Draping In Fashion?
Draping is a means by which fashion designers can three-dimensionally prototype their sketches on a mannequin or dress form. They do so by draping fabric over one of these forms and then pinning, pleating, and sewing where appropriate. Generally, you drape a design in a less expensive fabric than the one you plan to use for the final product. Draping grants you accessibility to the finer details of what makes a design work or not work pragmatically. Draping can help determine how breathable the clothes are or how well they might adapt to an economy of motion.
7 Steps to Draping a Dress
Follow these seven steps to start draping a dress design on your own:
1. Acquire materials. Before you start draping, you’ll need all the requisite materials. Purchase plenty of drapable fabrics like chiffon or muslin to experiment with, as well as a dress form or mannequin sized to the body type for which you’re designing. Sewing materials, pins, rulers, and shears are also must-haves.
2. Begin a design sketch. You should iron out the basic design details for your dress before you even start touching the fabric. This sketch (a “croquis” in the fashion industry) is the phase where you should plot out the general look of the neckline or length of the dress as a whole. Draw your design and include basic instructions for yourself about how much material you think you might need for any given element.
3. Make measurements. Take a ruler or measuring tape to all the relevant sections of the dress form or mannequin. You should get an idea of the front and back bodice, waistline, neckline, and so on. The goal here is to give you a more concrete picture of how much fabric you’ll need, where you will need to pin it, and what areas it should cling to. Once you have these measurements, take some shears to your fabric and begin cutting in accordance with them.
4. Overlay the mannequin. Swathe the dress form with fabric, starting with a foundation piece, moving on to the front and back bodices, and so forth. Alternate this step with the following one as you add one piece of fabric after another. This is where you’ll begin pinning and fitting the dress to the form itself. Tailor the draped dress to fit as you sketched it out.
5. Pin where necessary. As you add each piece of drapery to your mannequin, resolve all fitting issues. If the dress should cling tightly to the bodice, pin it tight and add some indications of where the seam lines should go once you remove it. If you want it to be flowier, pin it looser. Repeat the process as you add each piece of fabric to the front and back of the dress.
6. Remove the dress. Once you finish making all the relevant notches, pleats, tucks, and so on, take the draped garments carefully off of the dress form. Lay the dress on a nearby table to store it until you’re ready to move on to sewing your prototype.
7. Sew the seams. Now that you’ve completed the draping process of positioning and pinning all your loose garments, you can start to use seam and grain lines as a sewing pattern guide. Once you turn your draped dress into a set of sewn fabrics, you'll have a finished garment prototype.
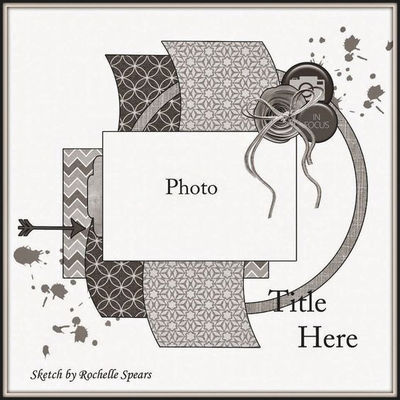
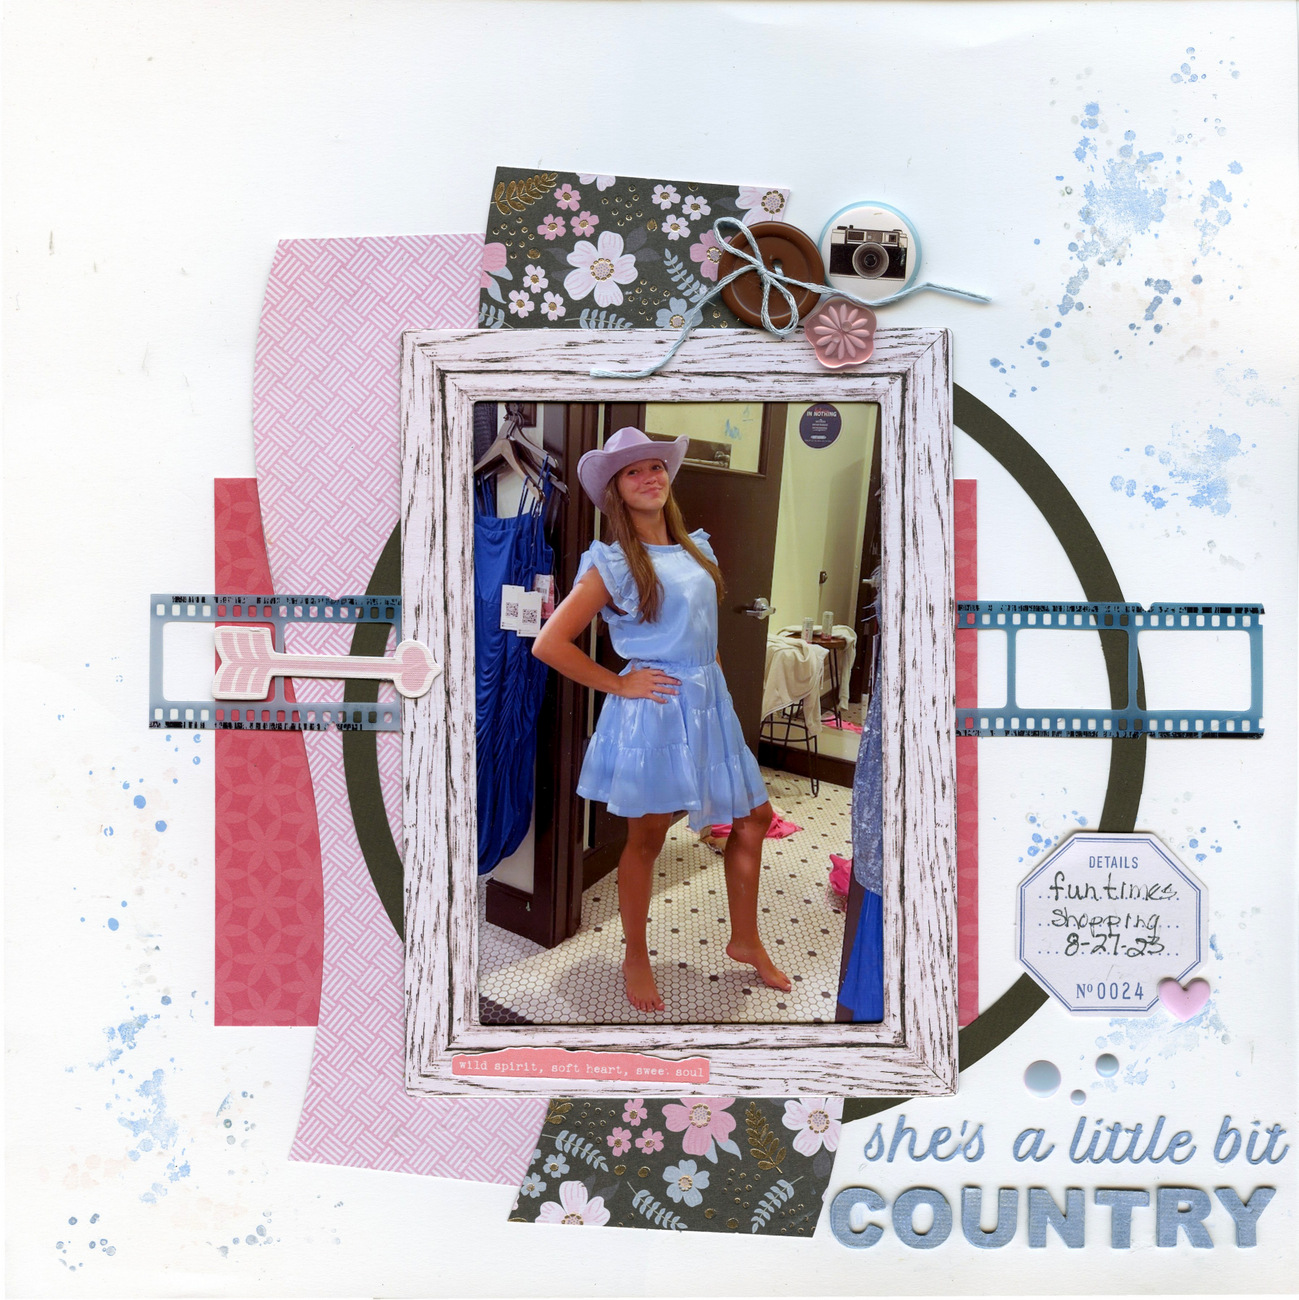
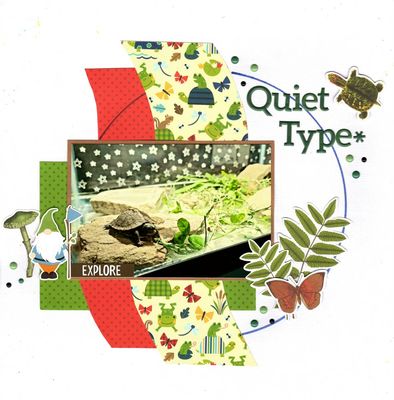
Today's challenge is to use the following sketch that shows a lot of motion. The additional challenge is to pick one double-sided pattern paper and use both sides--A & B-- on your LO as your main focus and then pick one other pattern paper that pulls a color from your picture to create the base. If you do not have double-sided patterned paper pick two sheets that go together.